.png)
Installation
Follow the steps below to install the AveriSource Platform™. Refer to the Prerequisites section before proceeding with the installation.
Initialization
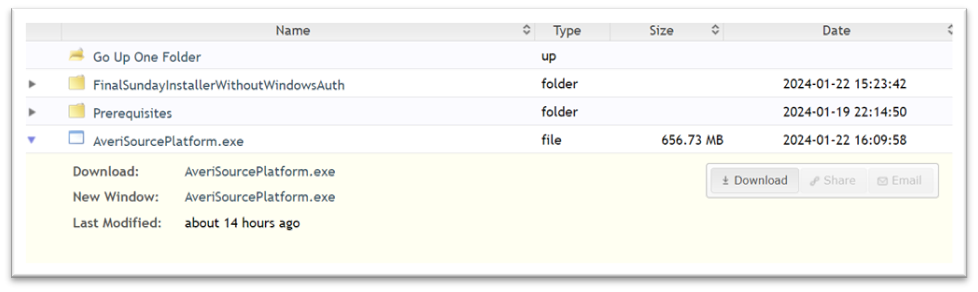
Download the AveriSourcePlatform.exe from the FTP site provided by AveriSource.
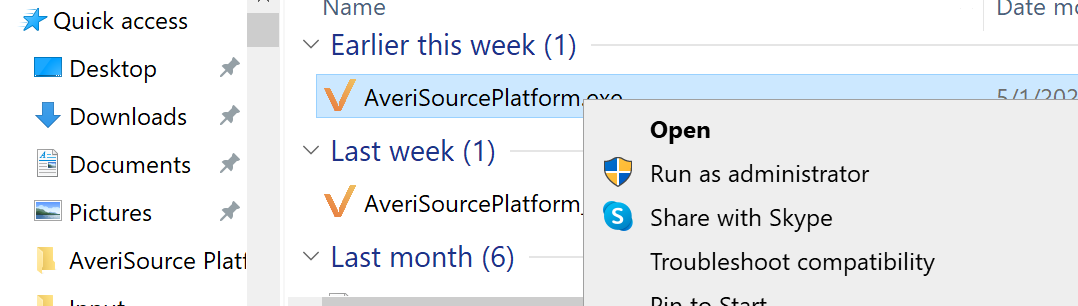
Once downloaded, run the .exe file as an administrator. (Note: Ensure admin privileges are available on the system where the AveriSource Platform will be installed.)
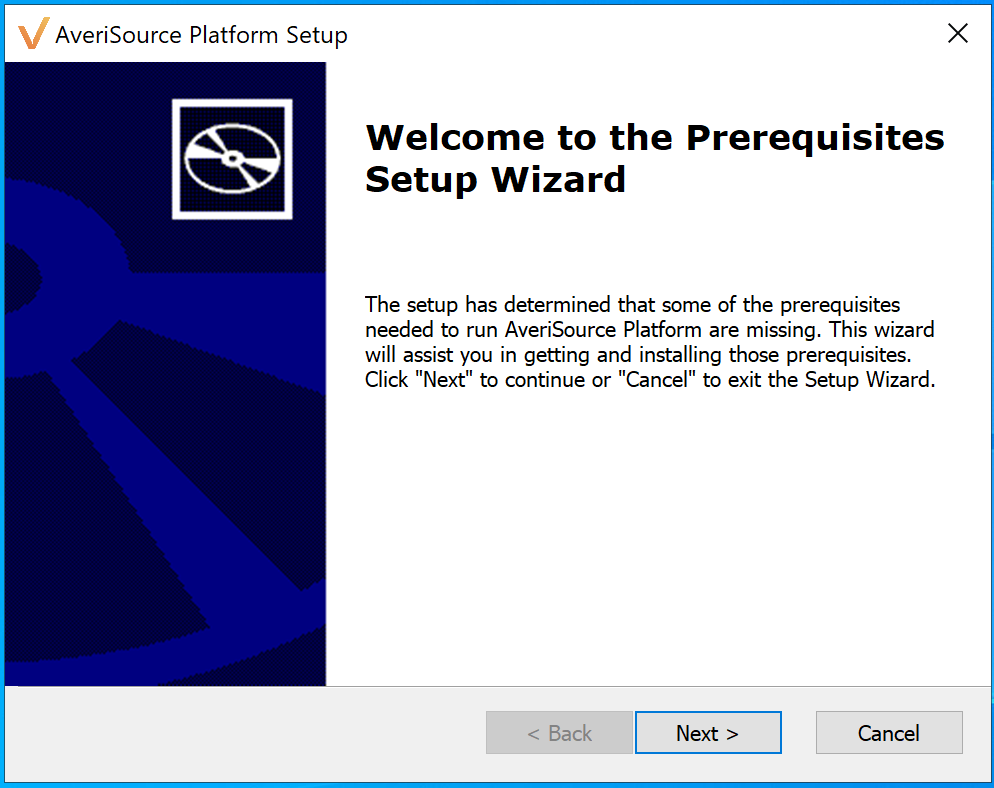
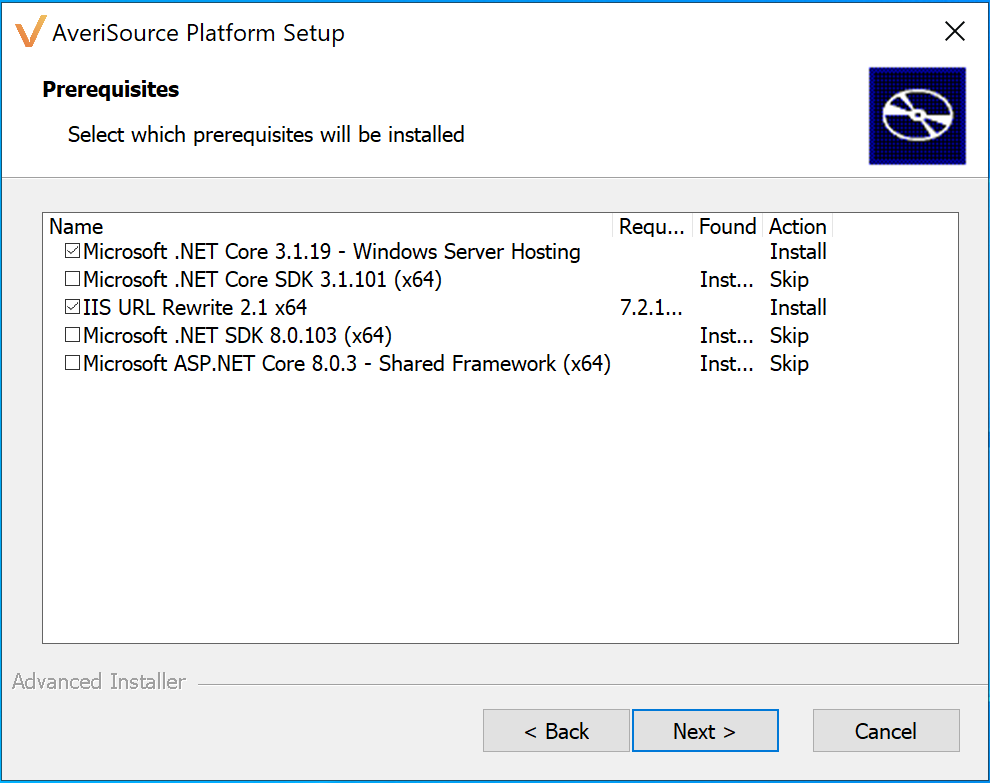
AveriSourcePlatform.exe will launch the Prerequisites Setup Wizard. Click Next to continue.
Continue with the Prerequisites selected by default.
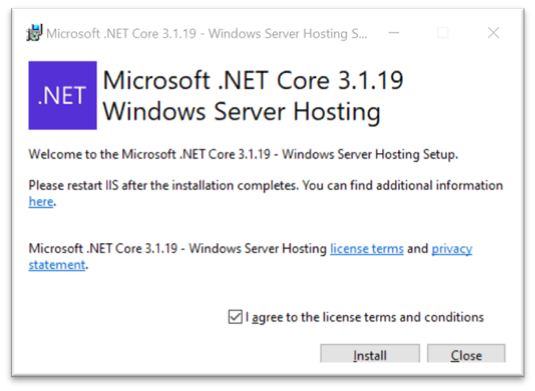
Continue with Microsoft .Net Core Windows Server Hosting. Click Install.
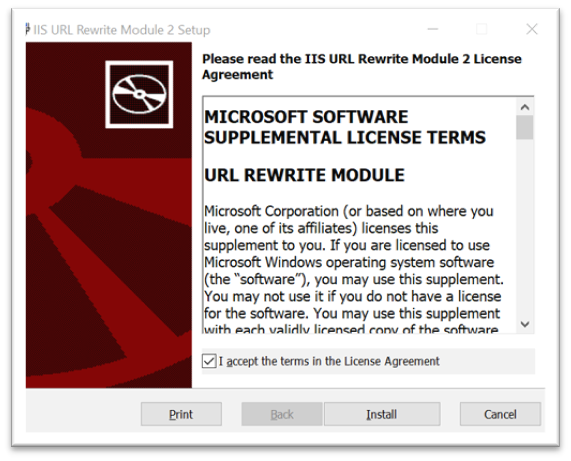
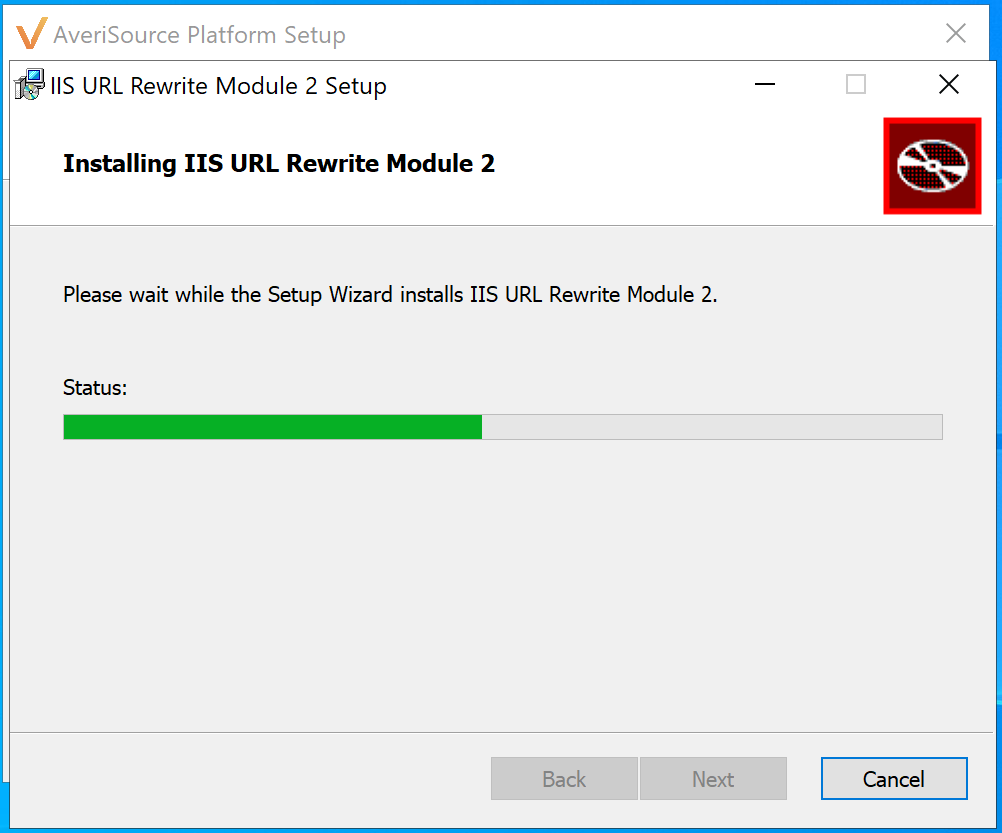
Continue with the Prerequisite's installation. It may take a few minutes.
When the AveriSource Platform installation is complete, it will automatically open the platform web UI in your default web browser.
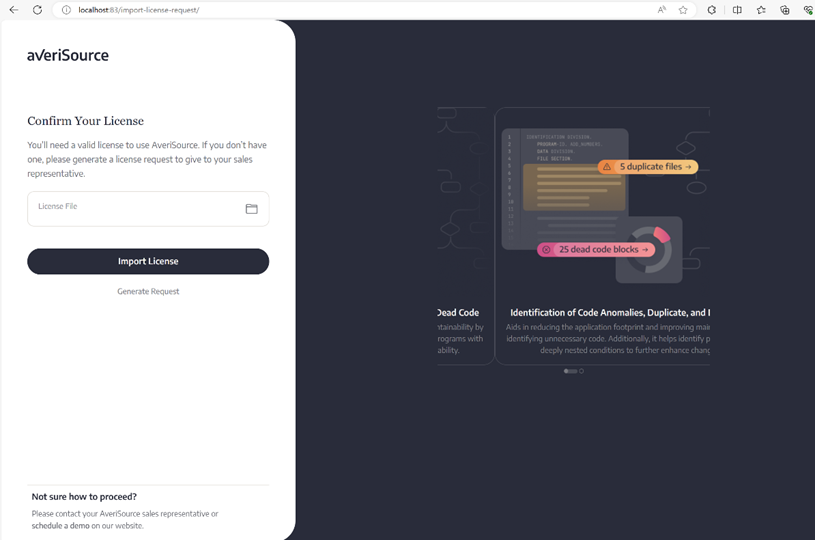
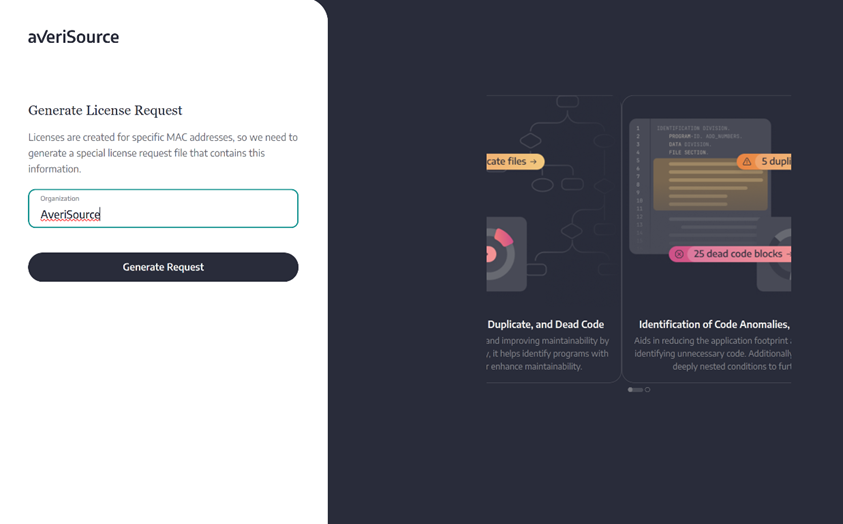
Click the Generate Request link in grey to generate a new license request. On the next screen, enter the organization name in the text box provided and click the Generate Request button.
This will generate a new license request file with an .avsreq extension, found in the Downloads folder by default. You can download the request file using the Download Request button and email it to hello@averisource.com. Then click the Back to License Selection button.
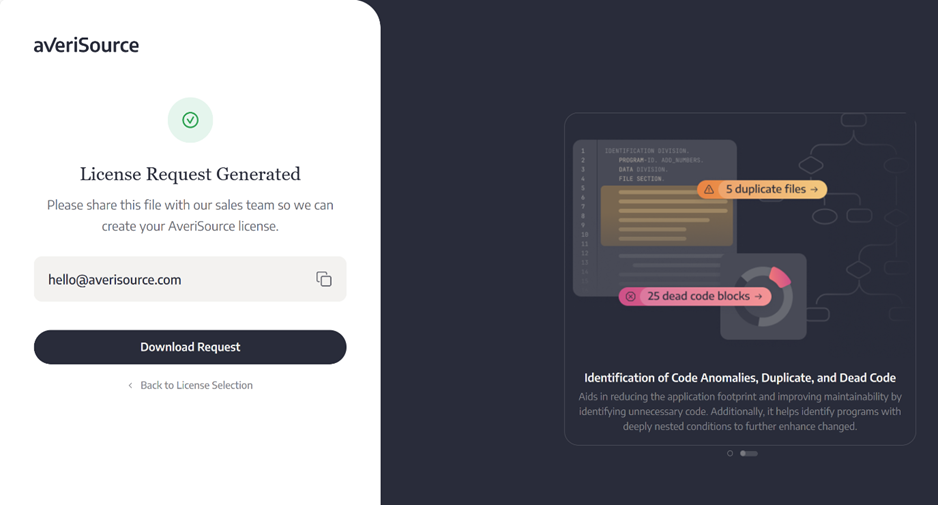
The AveriSource team will use the request file to generate a new license and send it back to the user.
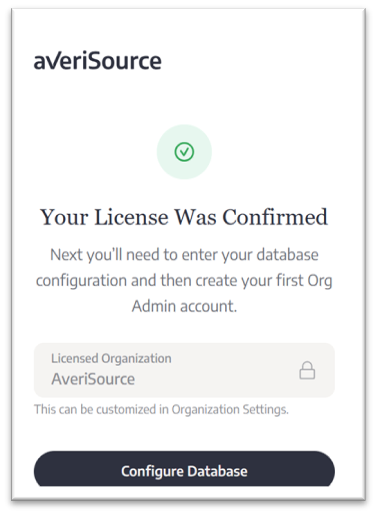
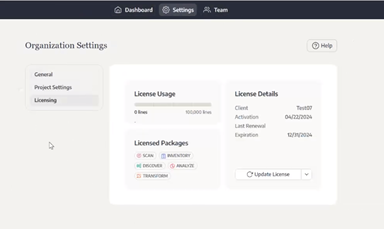
Once the license file is imported, the next step is to configure the database that will be used by the AveriSource Platform.
Provide the SQL Server Name and proceed for further validation.

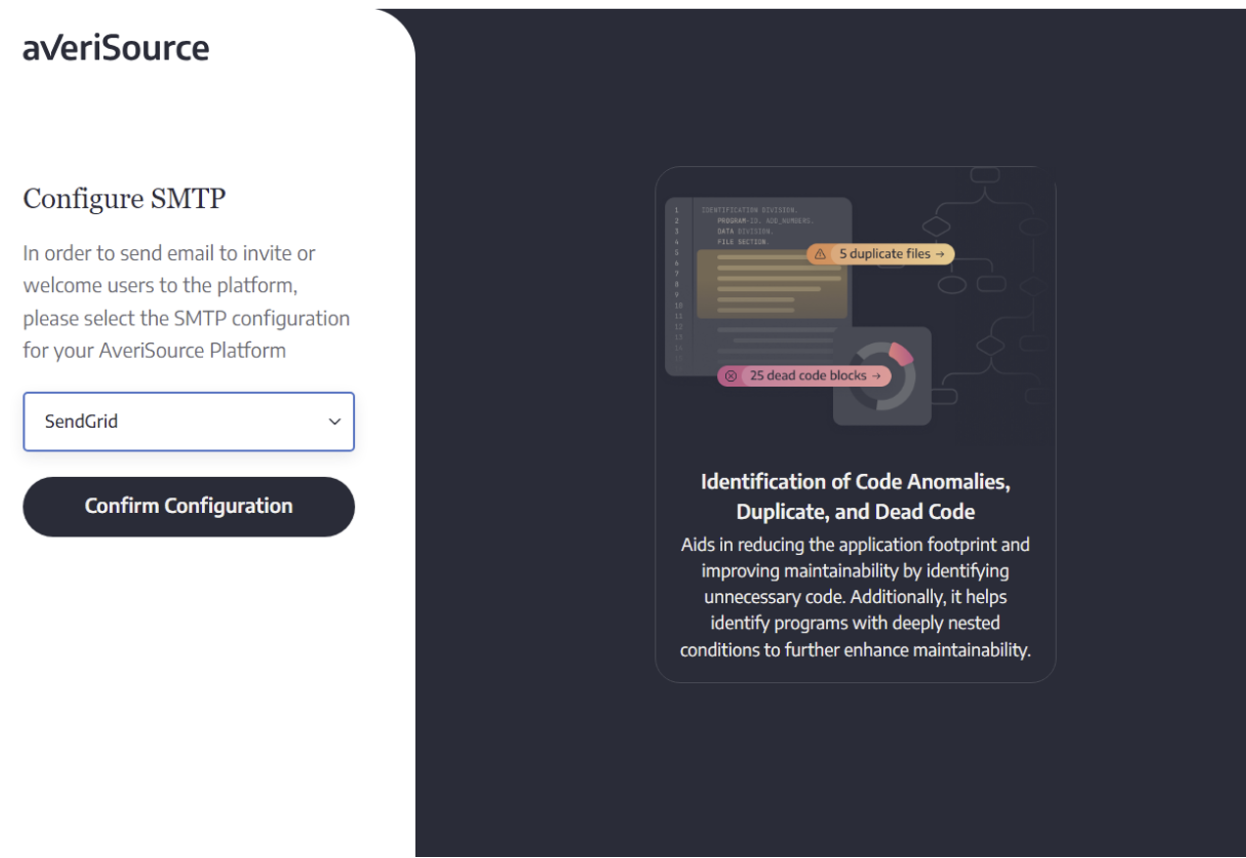
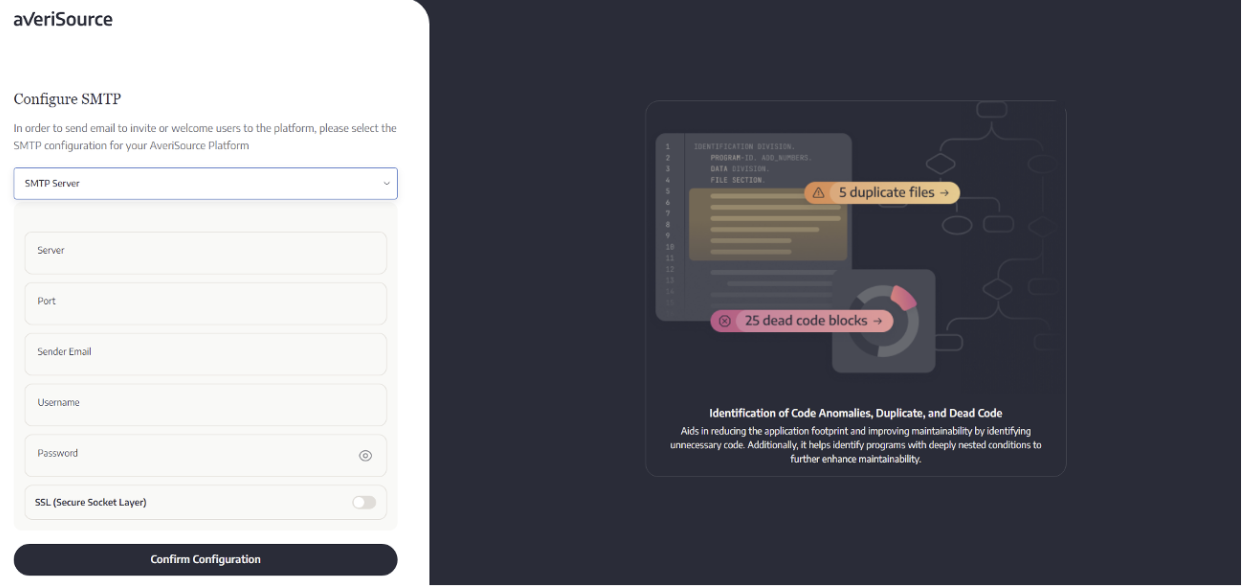
Once the connection is established to the database, the next step is to configure your preferred SMTP server. There are two options available, the SendGrid service or leverage your own internal SMTP server. The SendGrid option requires your network to allow outbound SMTP traffic from the AveriSource Platform.
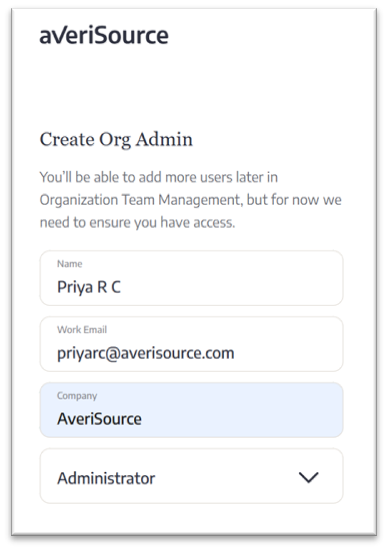
After configuring the SMTP server, the next step is to create an Org Admin, the organization administrator account and profile.
If using the AveriSource Platform 2.0, the installer will proceed to set up local user management. Choose Create Account to proceed.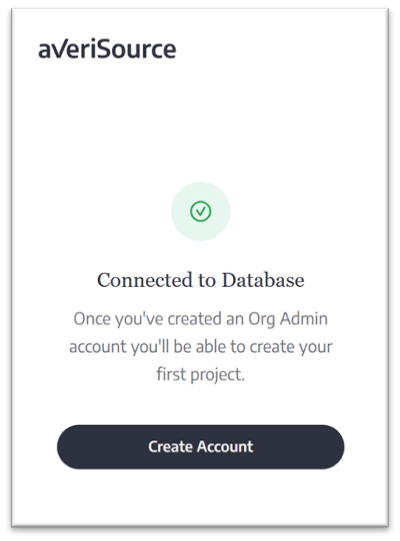
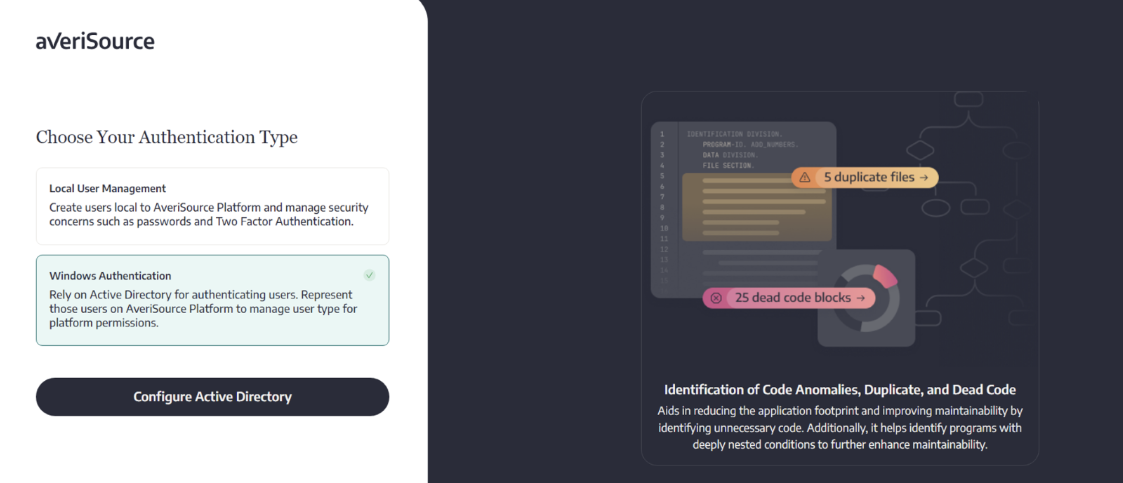
If using the AveriSource Platform 2.1 release, Windows Authentication has been added as an authentication type. Click Choose Authentication Type to proceed.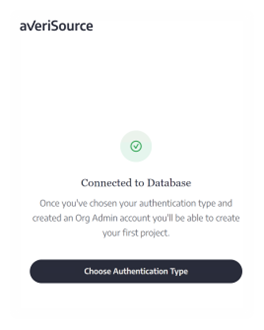
The Windows Authentication option allows the use of Active Directory credentials thereby eliminating the task of managing users locally. The second option is to create and manage users local to the AveriSource platform.
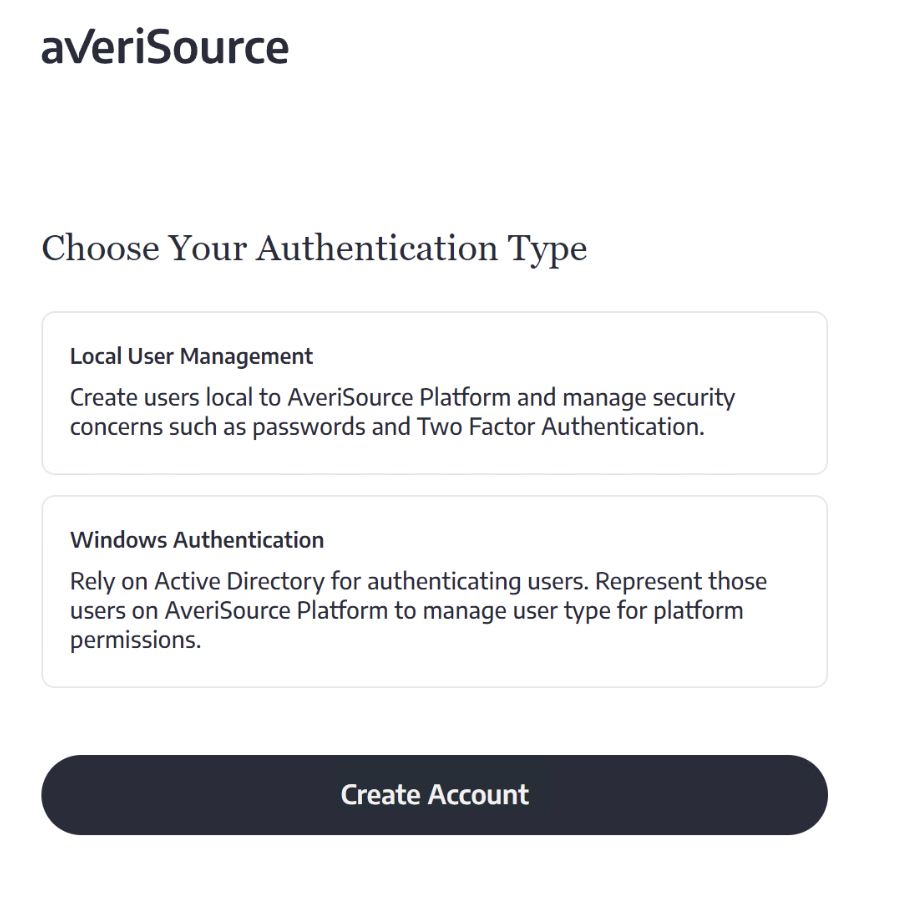
Local User Management
With local user management, administrators can create, manage, and authenticate users directly with the AveriSource Platform. Follow the steps below to set up local user management.
1. The Org Admin profile requires a valid email address and a password that meets all the criteria.
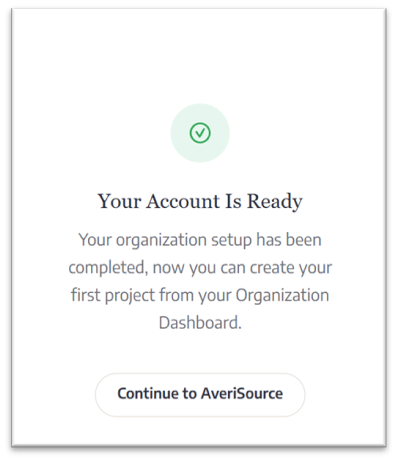
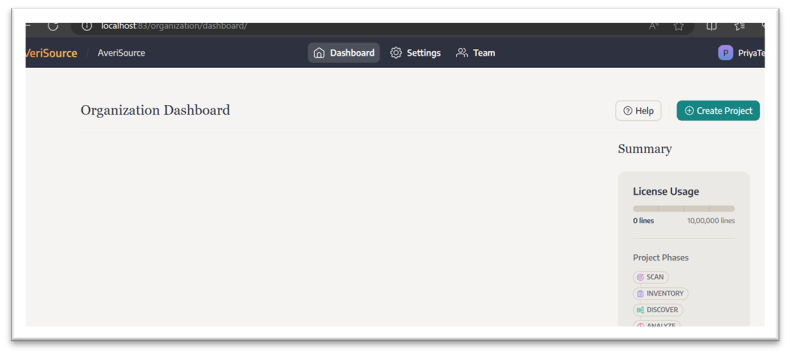
With successful account creation, the AveriSource Platform user interface, specifically the Organization Dashboard, is launched to begin creating projects.
Org Admins can now create projects by adding the relevant application source and start building an AveriSource Inventory within the Organization Dashboard.
Adding users with local user management
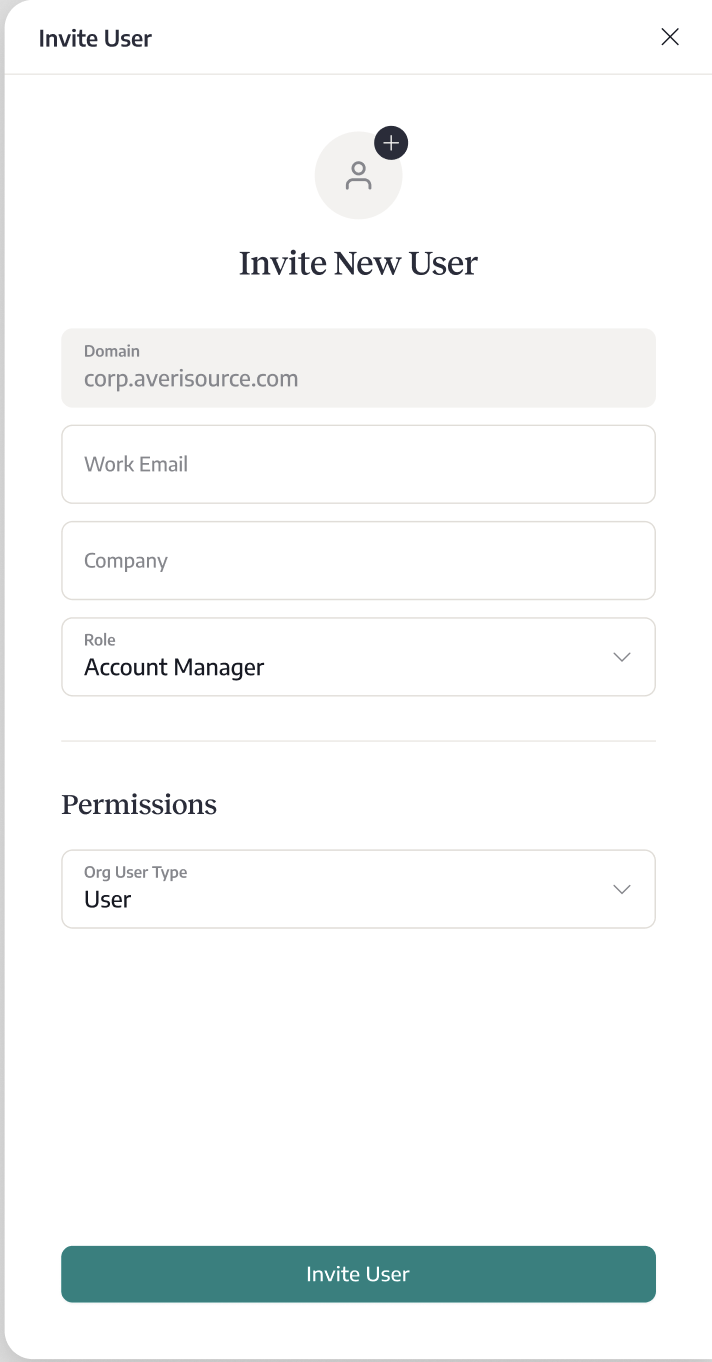
To add users to the AveriSource Platform with Local User Management, the Org Admin can click the Invite New User button under the Team menu under Organization Dashboard.
The details of the invited user including email, company name and user type are provided. Click Invite User and the new user will be invited via an email link.
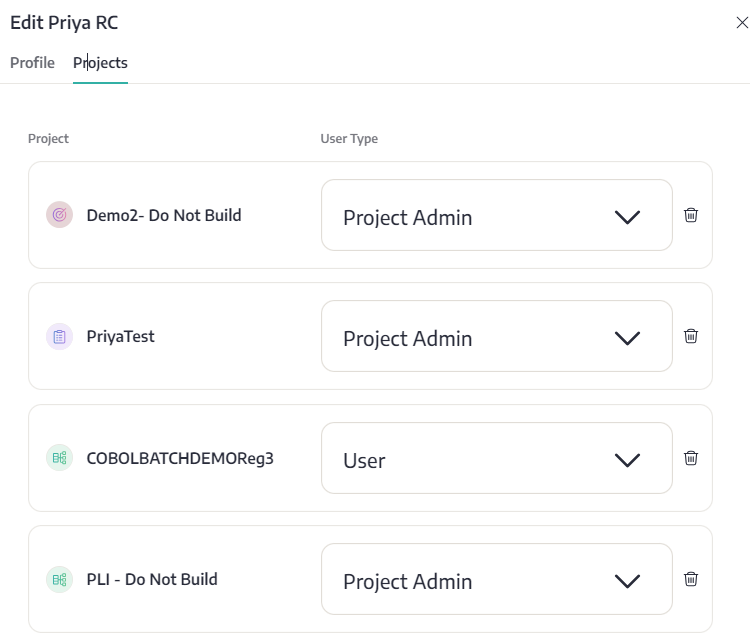
Once the new user is setup, access to further projects in the AveriSource platform can be edited by clicking on Edit User.
Select the User Type for each available project.
Windows Authentication
Starting with the AveriSource Platform 2.1, Windows Authentication has been added to simplify user management using Active Directory. As part of the 2.2.1 release, users are now able to configure the AveriSource Platform for an external Active Directory. This provides the ability to associate users from an external Active Directory rather than the Active Directory configured to the server where the AveriSource Platform is installed. Follow the steps below to configure Windows Authentication.
Choose Windows Authentication and click on “Configure Active Directory.”
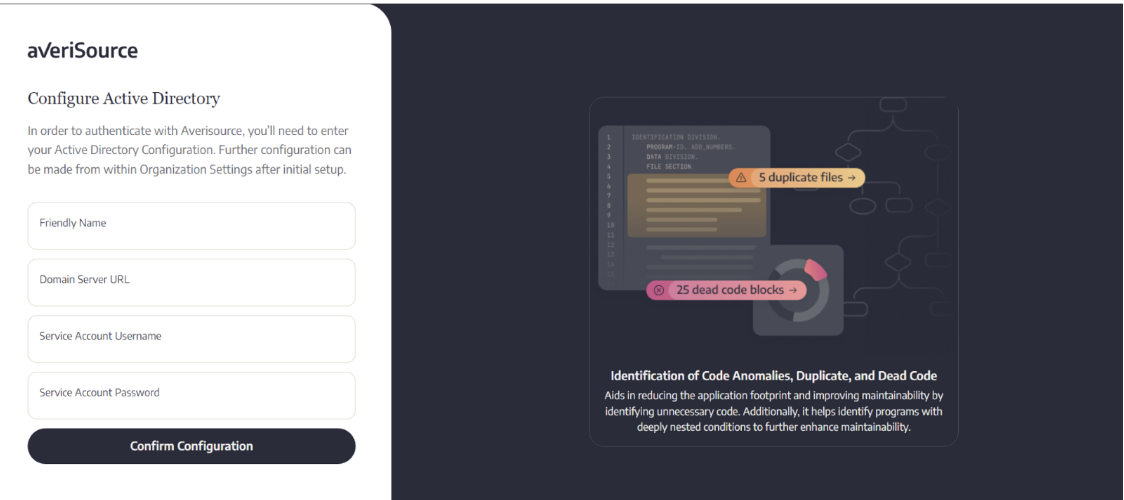
In the following screen, you will be asked to provide the Active Directory details including the account to authenticate with the Active Directory. After supplying the required information, click on “Confirm Configuration.”
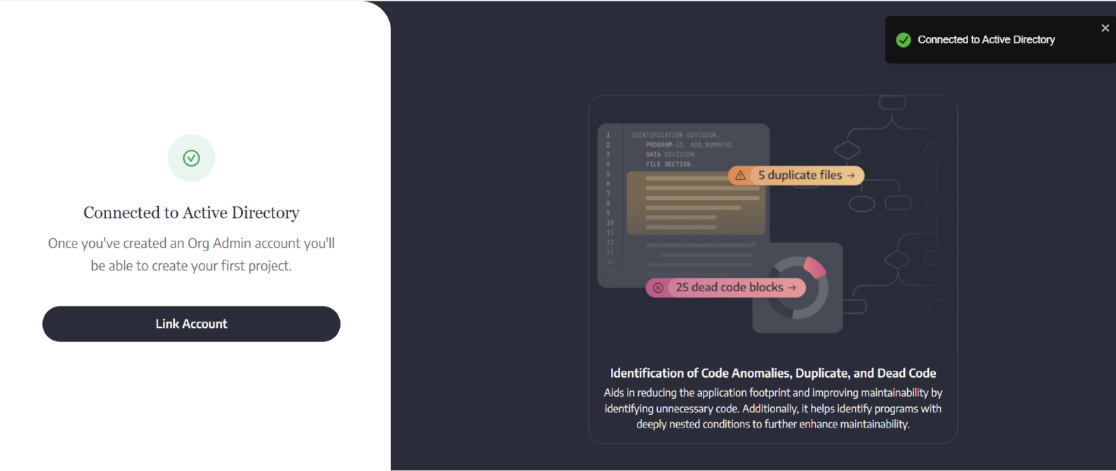
Upon a successful configuration, you can now link an initial account from the configured Active Directory instance. To do so, click on “Link Account.”
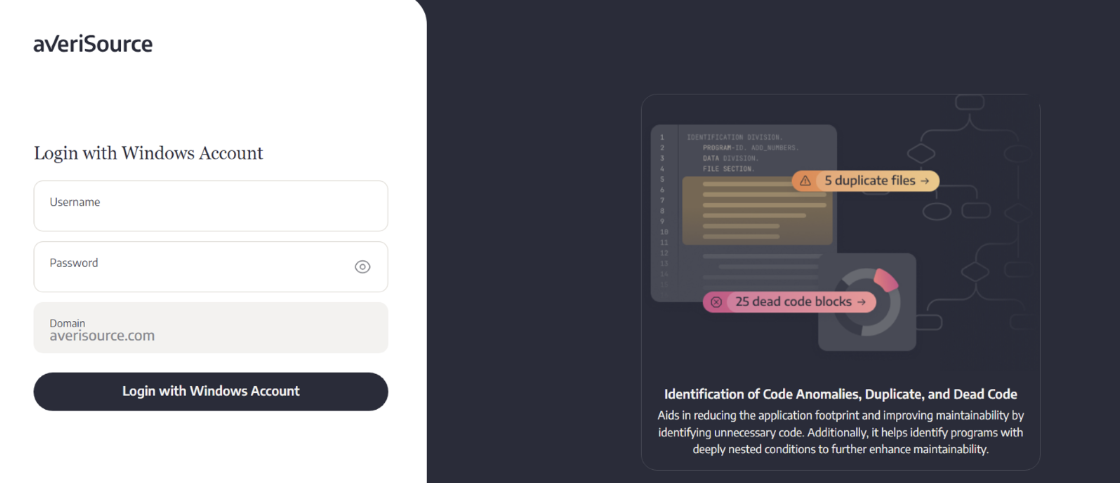
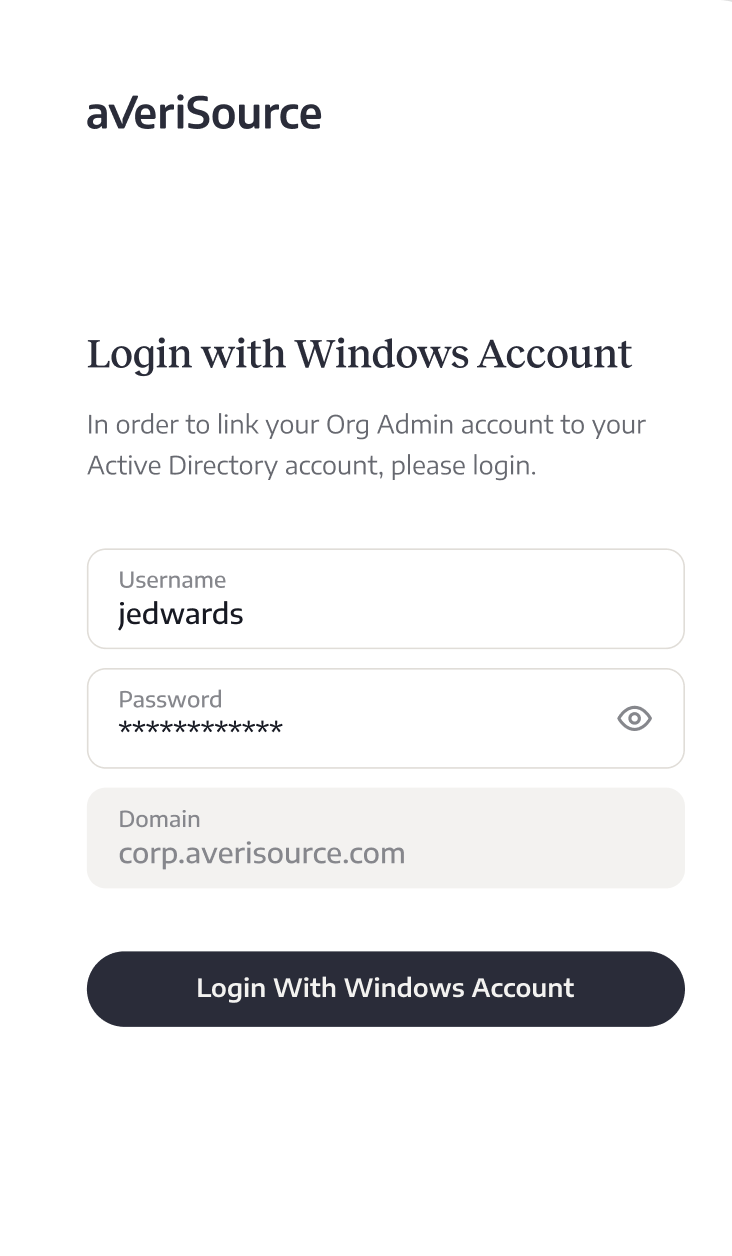
In the following screen, you will be asked to login with a Windows account. This initial login should be done with the user information who will be an OrgAdmin on the AveriSource Platform. To proceed, provide the username and password for this user and click “Login with Windows Account.”
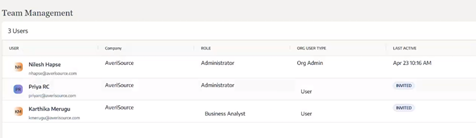
Note: Now that the users are created with Active Directory authentication, the AveriSource Org Admin will not have a role to play with user settings/management. This is evident from the screenshot below, which does not display “User Settings” as an option. Also, there will be no “PIN” column under Team Management. The role of the Org Admin in this case is now restricted to inviting other users to the AveriSource platform with relevant role.
Adding users with Windows Authentication
Follow these steps to add users to the AveriSource Platform with Windows Authentication.
The Org Admin invites new users to access the AveriSource Platform from the Organization Dashboard -> Team –>Invite User.

The Org Admin can now specify the User Type as “User” which lets the user log in with his Windows Active Directory credentials.
The new user gets a link to connect via email to the AveriSource platform. The user can choose to login with their Windows account as shown below.
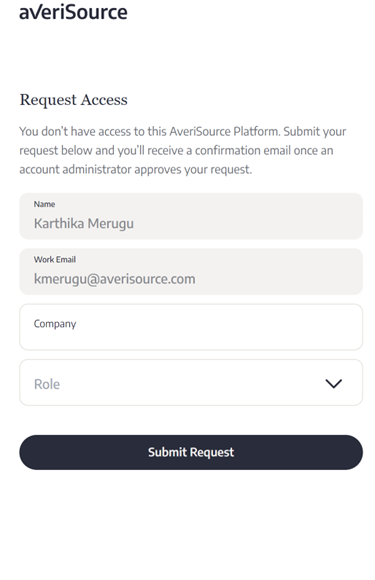
If the user doesn’t have access, they are prompted with the screen below and they may request access.
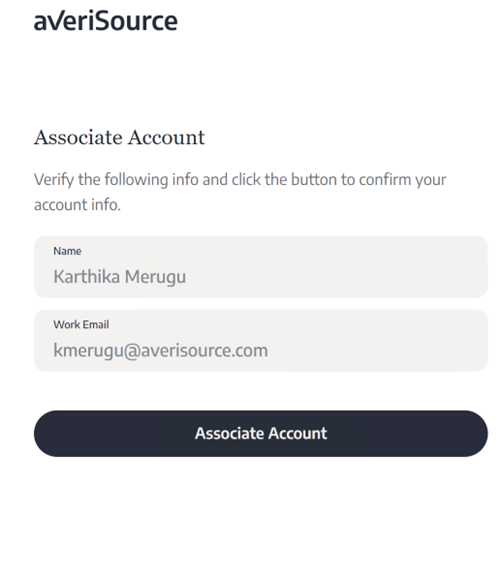
When the administrator approves the access request, the user will receive an email. The user needs to click on the link in the email and then enter Active Directory credentials on the login screen. On the next screen, the user will click on the Associate Account button to login to the AveriSource platform.
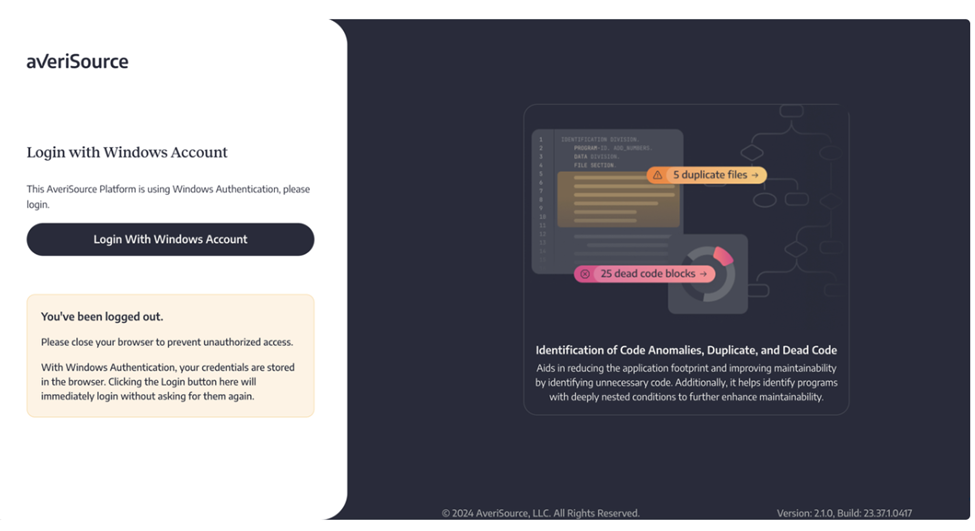
Note: Because Windows Authentication stores credentials in the browser, the user must close the browser after logging out. We recommend using a separate browser profile for the AveriSource Platform to avoid having to close unrelated browser tabs after logging out.